Key Lime Pie by The Guest Baker!

Krissy, our guest baker, returns with an awesome Key Lime Pie recipe! This isn't your green jello in a pre-made crust sort of pie, this is the authentic Florida dessert -- everything is made from scratch, from the pie crust to the whipped cream at the end! No one really knows when the first key lime pie was made, but it is known that prior to the opening of the Overseas Highway in 1930 luxuries such as fresh milk were unavailable. Due to the lack of milk and refrigeration, items such as sweetened condensed milk were a staple in many recipes. Early on, key lime pies were not baked as they relied on a chemical reaction between the milk and lime juice called 'souring' – this produced a thick, creamy texture. In the interest of food safety, the pies are baked now and the pie takes on an even more custard-like texture.
Key limes (Citrus aurantifolia) are quite different from regular Persian limes. They are significantly smaller, seedier and more fragrant than a regular lime. They are ripe when their skin is mostly yellow and their rind is also thinner than a traditional lime.
In its simplest form, one only needs a crust, sweetened condensed milk, lime juice and egg yolks, but never...ever, EVER green food coloring. The beauty of the key lime pie is its pale yellow color that comes mostly from the egg yolks.
In 2006, the Key Lime Pie became the official pie of the state of Florida, but long before that my husband - Dave and I have loved the sweet, sour and versatile key lime pie. Before we ever set foot in the Keys, our first summer was spent trying the pie at every restaurant we ran across. It was only later when we finally planned our first trip to the Keys did we realize how many different ways one could eat key lime pie: plain, frozen, fried, chocolate dipped, chocolate lined crust, fruit filled, meringue topped...

Time for a trip to the Keys without leaving your home!
This recipe can quickly be made with store bought ingredients (juice, shell), but I decided to make my own crust and give my new 11" tart pan a try. (See ingredient list at end for additions to make the tart).
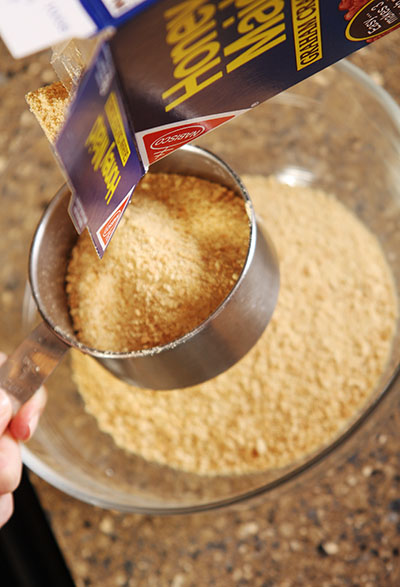
Preheat the oven to 375 degrees. While the oven is preheating I prep the ingredients for a graham cracker crust.
- 1 ½ cups Graham Cracker Crumbs
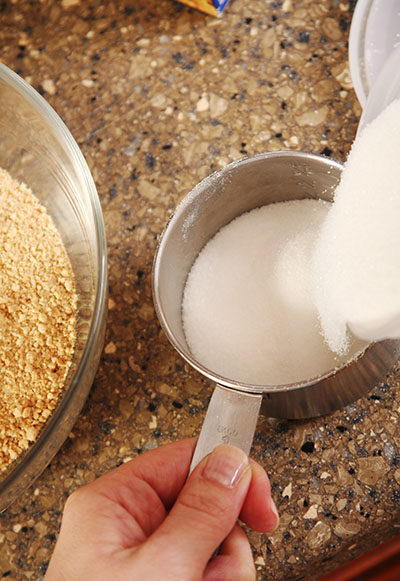
- 1/3 cup of sugar
- 6-8 tablespoons butter
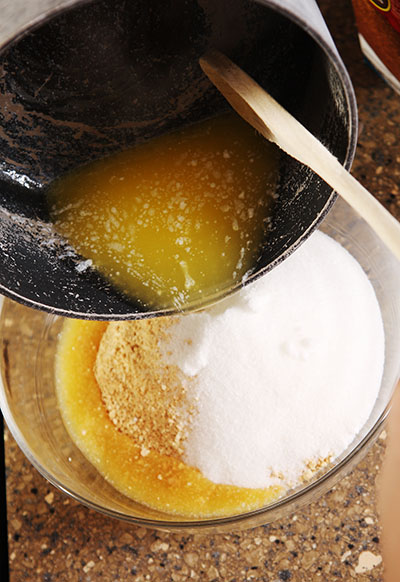
Begin by melting a stick of butter over medium heat.

While the butter is melting, measure the graham cracker crumbs and sugar into a bowl.
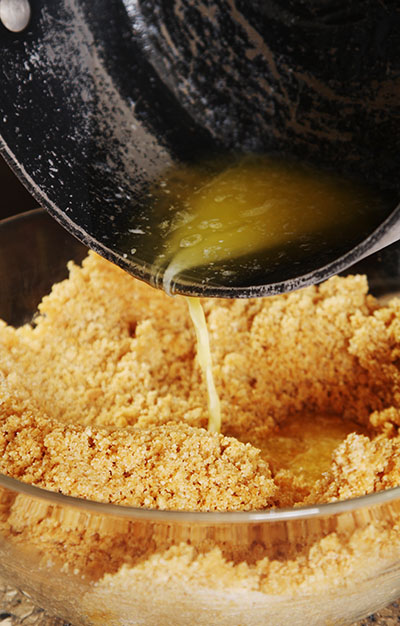
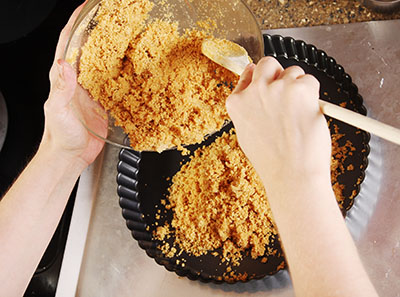
Once the butter is melted, slowly add and stir to the graham cracker/sugar mixture. Combine until the mixture comes together and does not appear dry.
If necessary, just add more butter!
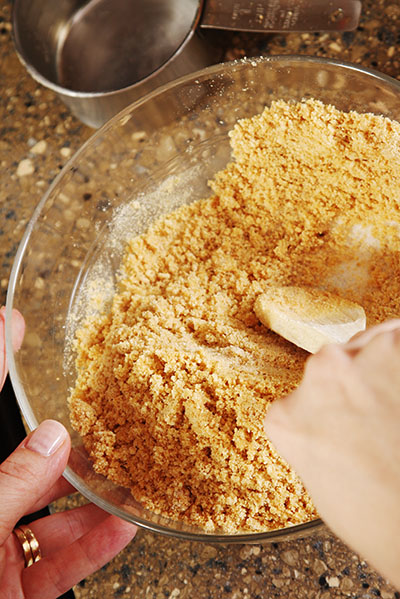
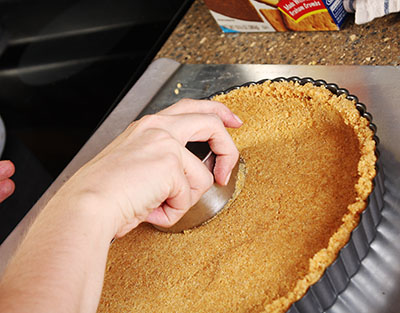
Once combined, empty the mixture into a tart or pie pan.
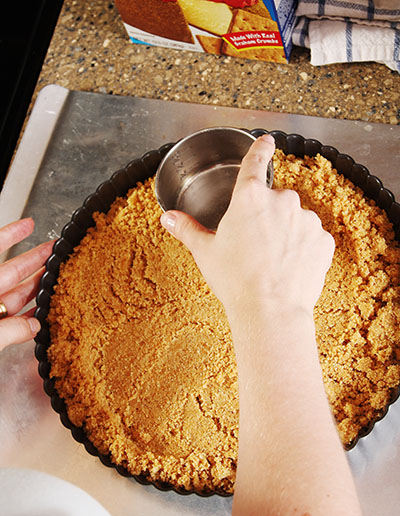
Using the back of spoon, your hand or a measuring cup (shown) press to evenly distribute the graham cracker mixture into the tart or pie pan.
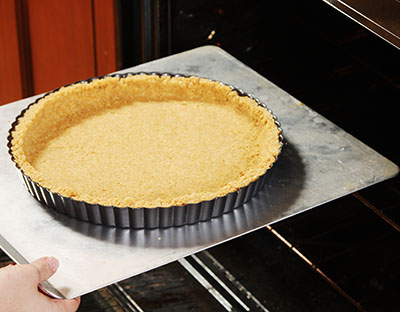
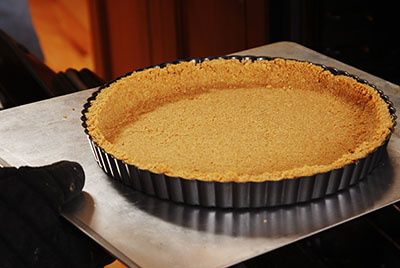
Once the crust is ready, place into a preheated oven and bake for 10 minutes.
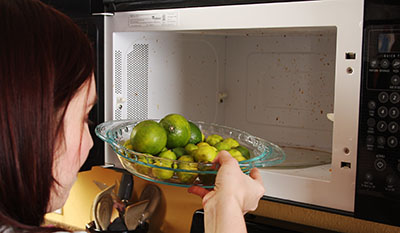
While waiting for the crust to bake, now is the time to prepare the limes. I have a mixture of key and Persian limes (just in case we need more juice or zest). Tip: To make the limes easier to juice, cook them in the microwave for about 10 seconds.
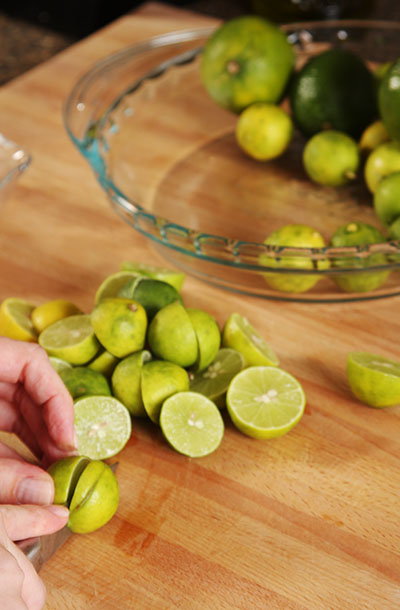
Before slicing and juicing the limes it is a good idea to zest a few for the filling and set aside. Tip: For juicing, gently roll the lime on the countertop - but not too hard because you can burst the lime!
Now cut all the itty bit key limes. Ideally, the perfect key lime should have a pale yellow skin, maybe with a few healthy looking brown spots. The large limes in the background are Persians, which you can use if key limes or key lime juice is not available. I used an entire bag of Mexican key limes for the recipe, whereas 5-6 Persian limes would do the same job.
Bottled Juice: If you decide to use bottled juice (perfectly acceptable substitute), the pie will be a bit more tart. I have seen key lime juice in a variety of places in the grocery store: juice aisle (with lime and lemon juice), baking aisle and in the produce section.
Time to juice the limes. If you are lucky, your hands will have the wonderful smell of key limes for the next few hours otherwise, otherwise you may begin to feel every tiny nick/cut in your hand.

Just as I started juicing the limes, the crust was ready to come out of the oven. The crust has an ever so slight golden brown color to it.
Place crust off to the side and cool slightly.
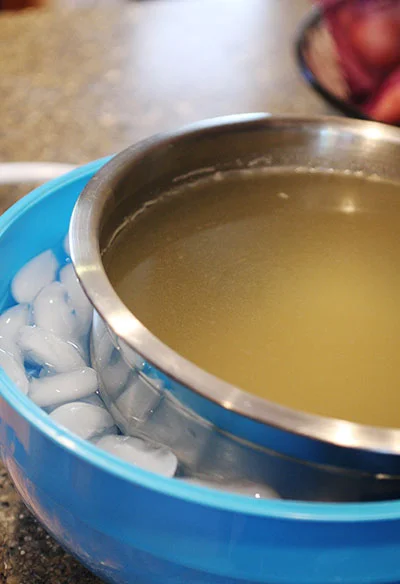
As the juicer begins to fill, place a fine meshed sieve over a measuring cup to catch any seeds and excess debris from getting into the juice. If you choose to add pulp to your pie, the sieve is a good place to get it from.
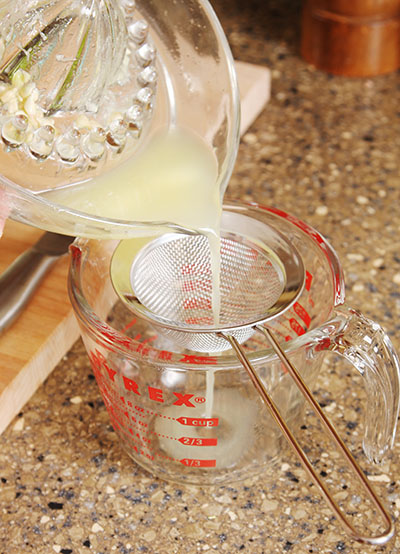
Removing pulp from juiced limes. The pulp adds another layer of tanginess and texture to the pie.

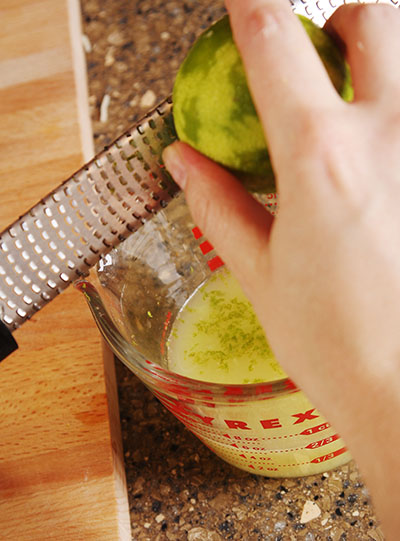
Using a microplane zester, zest a lime (green part only) into the juice and pulp mixture. The zest adds another dimension of color to the pale yellow pie. It is an optional ingredient, but I think it adds a nice touch and key lime pie can never be too tangy!
Once the juicing is complete, it is time to finish the rest of the pie filling. Into a non-reactive bowl (glass) dish combine:
- 1 - 14oz can of sweetened condensed milk
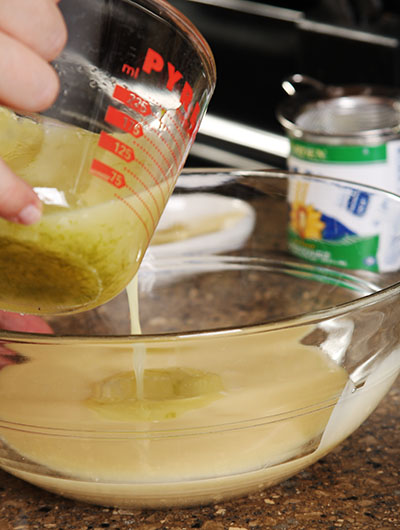
- key lime juice mixture (juice, zest, pulp)
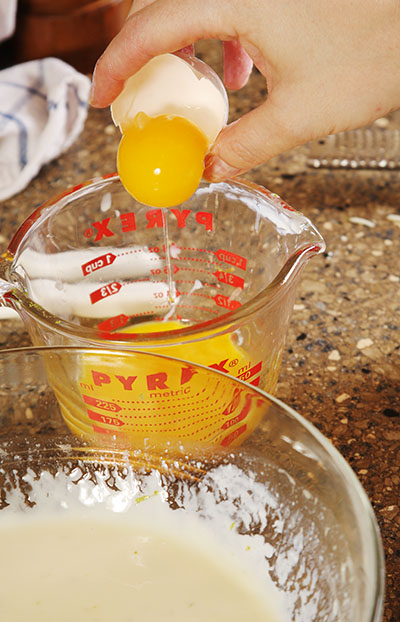
- 5 egg yolks
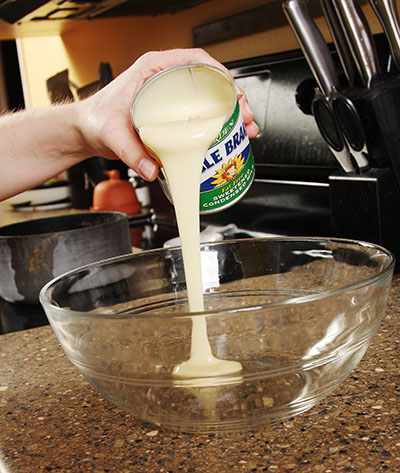
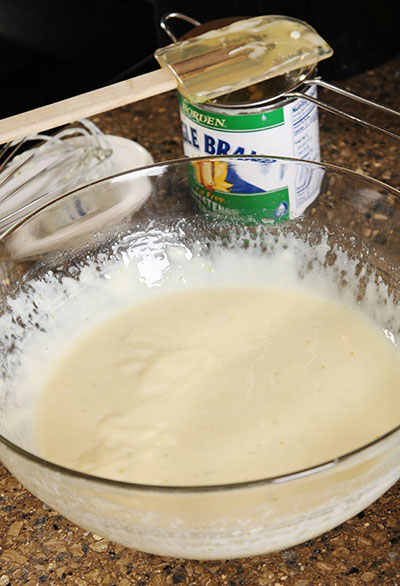
Add lime juice to sweetened condensed milk. Whisk together, until well combined.
Seperate the egg yolks from the whites. The eggs should come straight from the refrigerator for easier separation. There are many methods of egg separation:
- Crack the egg open on a flat surface and pass the yolk from shell half to shell half (shown below)
- Crack the egg and cradle the yolk in your hand with fingers slightly opened. Allow the whites to run through your fingers into another bowl (risk of yolk breaking in hand)
- Use an egg yolk separator (generally the easiest)
Tip: Freeze the egg whites for later use. (As suggested by Peter as we were waiting for the pie to bake.)

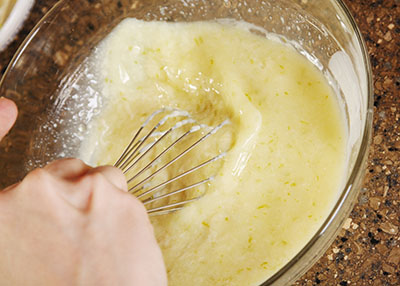
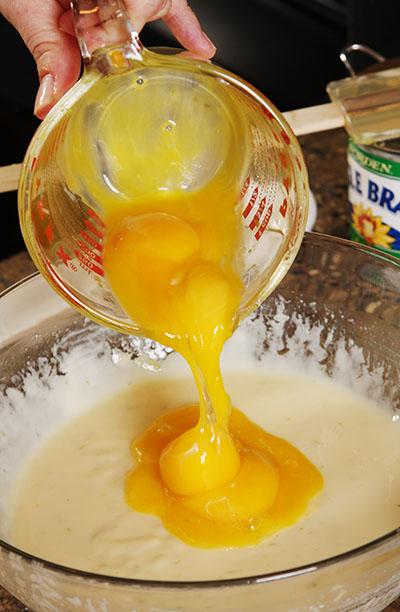
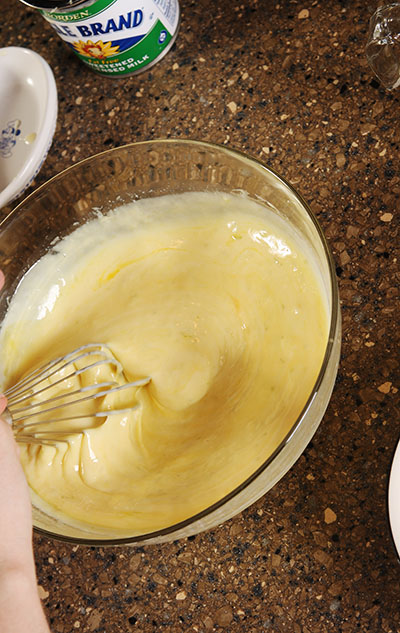
Once the yolks are separated, add to the milk and lime mixture and thoroughly combine.
This is the color of a true key lime pie.
Gently add the key lime pie filling to the crust. (The filling is a slightly lighter color as we added an extra can of sweetened condensed milk and more lime juice to fill out the tart pan.)
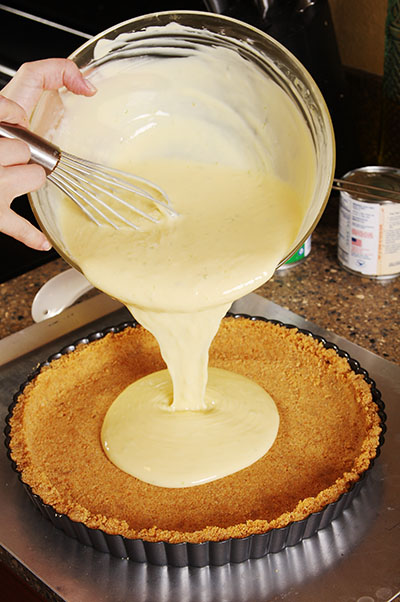
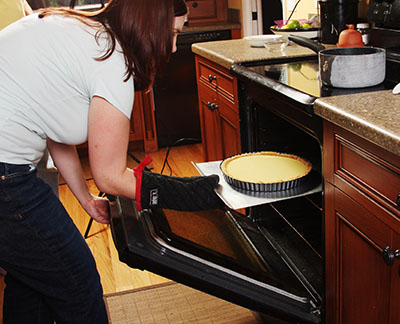
After filling the crust, gently shake the pan from side to side to ensure there are no air bubbles and everything is even. Place in oven and bake for 15 minutes.

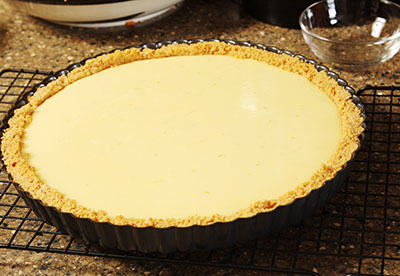
The pie is ready to be removed from the oven when the outer edge of the filling just starts to cook, and the center still wiggles slightly.
The purpose of the baking is really just to kill any bacteria that may be present, and to thicken the pie just a bit more. After the pie cools slightly, place in the refrigerator for at least 1-2 hours before attempting to cut.
Since everything about the pie has been made from scratch to this point, let's make some sweetened whipped cream for the pie topping. You will need:
- 8 oz heavy whipping cream (½ pint)
- 1/3 cup sugar
- 1 tsp vanilla extract
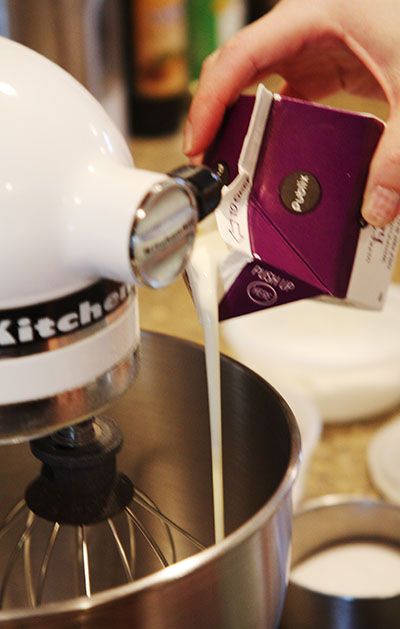
Begin by attaching the whisk attachment on a stand mixer. Many recommend chilling the whisk and bowl for about 5-10 minutes in the freezer before whipping.
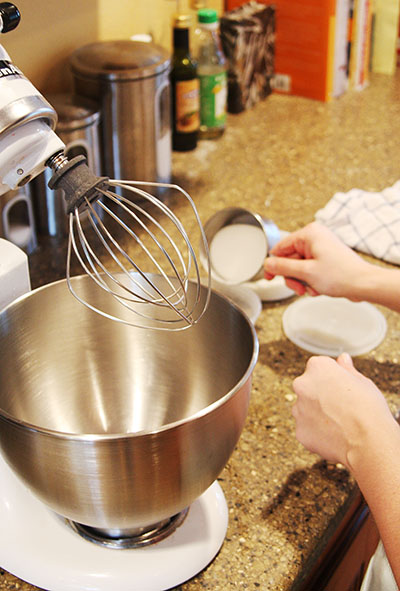
Pour heavy whipping cream into bowl. Make sure the whipping cream has come directly from the refrigerator as this will allow it to whip better.
On medium high speed (speed 6-8 here), whip until soft peaks are just about to form.
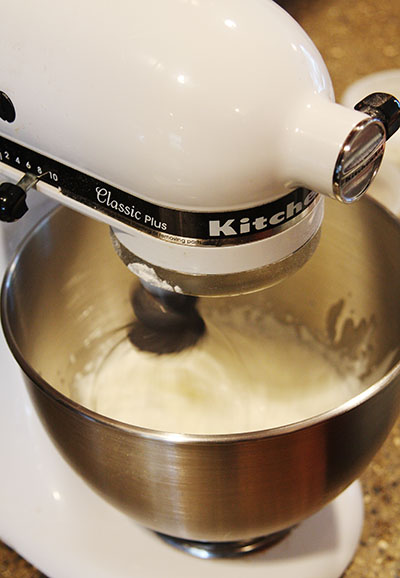
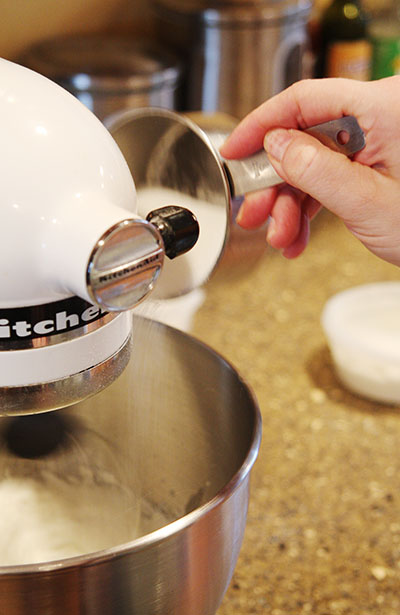
Lower the mixing speed and slowly add the sugar and vanilla. Then, slowly increase mixer speed until soft peaks are about to form. Do NOT overbeat, otherwise whipped cream will become lumpy.
To check the whipping cream you can turn the mixer off and check the tip of the whisk. Soft peaks will look fluffy, and the whipped cream at the tip of the whisk will gently bend over. If it stands up straight, you have hard peaks.

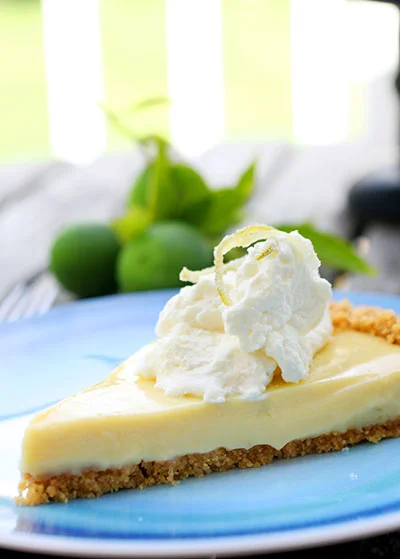
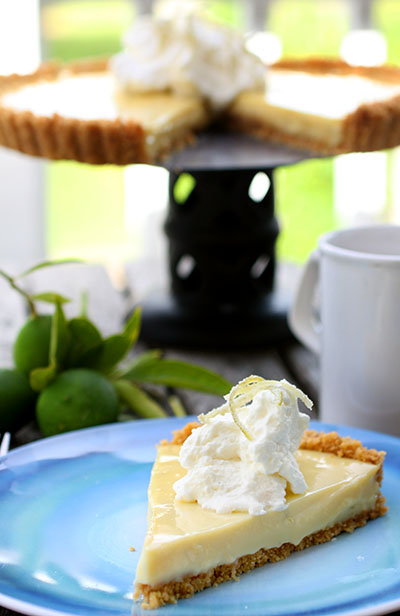
There are a variety of ways to serve a key lime pie. For this serving, a simple dollop of whipped cream garnished with a few pieces of candied lime zest. Pour a cup of hot coffee and impress your friends with this simple, yet tasty subtropical dessert!
Final Thoughts:
The tart pan made for an eye appealing crust. The key is definitely allowing time for the pie to cool before cutting. The texture between a somewhat cooled pie and a pie that has been in the refrigerator is pretty big. Also, the different between perfect whipped cream and over beaten whipped cream can happen in a split second. The whipped cream was tasty, but I think it could have been fluffier. No doubt this pie was definitely a winner after lovingly juicing all the key limes!
Recipes:
Key Lime Pie Yields: 9" pie in prepared crust
1 (9 inch) prepared graham cracker crust 5 egg yolks, beaten 1 (14 ounce) can sweetened condensed milk ¾ cup key lime juice *Optional: 1 tablespoon lime zest *Optional: 1 tablespoon lime pulp
For 11” tart to the above add: 1/4 cup key lime juice 1 (14 ounce) can sweetened condensed milk
Key Lime Pie Directions:
- Preheat oven to 375 degrees (F).
- Clean and zest limes before juicing, and scrape pulp from juiced limes. Add zest and pulp to lime juice.
- In a non-reactive (glass) bowl combine sweetened condensed milk and lime juice mixture. Mix well
- Add egg yolks and combine well.
- Gently pour filling into graham cracker crust.
- Bake for 15 minutes and cool slightly before cooling completely in the refrigerator for at least 1-2 hours before cutting.
- Garnish and serve
Graham Cracker Crust Yields: 11" tart pan crust
1 ½ cups Graham Cracker Crumbs 1/3 cup of sugar 6-8 tablespoons butter
Graham Cracker Crust Directions:
- Preheat oven to 375 degrees (F).
- Melt butter over medium heat.
- Combine graham cracker crumbs and sugar.
- Slowly add butter to the graham cracker and sugar mixture, until it comes together enough to form a crust.
- Press graham cracker mixture into pie pan with the back of a spoon, hand or measuring cup.
- Bake for 10 minutes.
- Cool slightly before using.
Sweetened Whipped Cream 8 oz heavy whipping cream (½ pint) 1/3 cup sugar 1 tsp vanilla extract
Sweetened Whipped Cream Directions:
- Pour heavy whipping cream into bowl of a mixer fitted with a whisk attachment.
- On medium high speed (6-8 stand mixer), whip until soft peaks are just about to form.
- Lower mixer speed and slowly add sugar and vanilla.
- Slowly increase mixer speed until soft peaks form. Do NOT overbeat, otherwise whipped cream will become lumpy.
- Chill in refrigerator until ready to use.